

Pixel Perfect! Template (W.I.P)
 Two.E
Member Posts: 599
Two.E
Member Posts: 599
Hello Community.
I had a spare half hour so I decided to go wild and try something new.... A grid mechanism. (A joke!, I almost always do grids. I might have a problem).
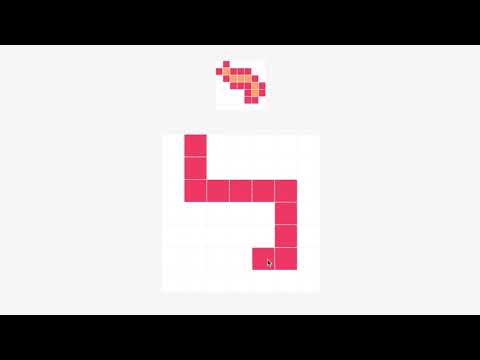
Pixel Perfect is a very minimalistic puzzle game. I think there are several different variations of this on the App Store. Basically, you drag your finger around the grid colouring in the squares in an attempt to re-create the above picture. There are a few rules:
- You can't let go of touch (you can but you will start again, or win if you match)
- You can only select adjust squares
- Selecting a square multiple times changes its colour.
Simple. I thought it would be nice to tackle a simpler idea to showcase how how simple can still be fun/challenging.
Its nothing pretty at the moment, but from my testing designs, I think its going to turn out really nice.
Now, I have no idea if these posts are useful or engaging, but I wanted to provide some different content over the next few weeks while I still have my subscription. This way, you can see my thought process, the problems and the way I solve them. Of course, any feedback is always welcomed. (Or if this is breaking rules or no one is interested, feel free to contact me)
Progress #1:
Today, I had limited time. This meant getting a prototype completed as quick as possible.
The logic is fairly simple.
I have a big grid of 49 actors (7 x 7). Each as their own ID value. This will tell me where it is on the grid so I can check if it has the correct answer.
In this actor, I have a another attribute called Colour ID (set to 0).
When touch is over this actor, it will increase this to plus 1.
Each colour ID value is a different colour. Simple.
To change the actual colour, I have a table with 3 columns. One each for Red, Green, Blue values. Each row is a different colour. With the first row being white (255,255,255). This way, if the actor needs to change to the 3rd colour, it would simply reference row 3 for each RGB values.
For the smaller grid, I do the same process. Except without the Colour ID attribute. Since this grids main purpose is to show the answer, it needs to instead reference the level. Lets come back to this actor soon.
**How a level is built. **
I added a Table and called it Level. I added 49 rows, since thats how many actors I have in my grid. Then, if I wanted an actor to show a particular colour. I change the row value to that value. For example, here is me planning out Level #1:

From this, I now know that I want actors with the following ID to display the first colour:
9, 10, 11, 12, 13, 20, 27, 34, 41, 40, 39, 38, 37, 30, 23, 16
Therefore, for those rows I changed their values to a 1. The rest remained 0, since that means those actors in the grid shouldn't be selected at all.
Heading back to our small grid, each grid now changes it colour (Using the Table_Colour) based on what the Table_Level says.
Selecting Logic:
For our big actors, I have a rule that checks if it has been pressed. If so, then it tells a game.attribute its ID value.
Another seperate rules check if the actor has Touch Inside. And if so, if its own ID value is equal to ANY:
- 1, -1, +7 or -7 in value to the Game.Attribute.
This checking if its adjacent to the previous actor touched. If so, then it changes the game.attribute to its own ID, and changes its own Colour ID to +1.
A new rule is used to check if Touch.Count is equal to 0. (I.E player is no longer touching the screen).
It then checks if its own Colour ID value is equal to the same value in the row equal to its own ID value, in the Table_Level.
If Not, it will change a Game.Attribute called FAIL to true.
New Levels:
Last, I added a new actor and called it Computer. It has one rule.
When Touch.Count = 0, change Game.Attribute FAIL to false.
Then after 0.1 Seconds (add a timer) check if Game.Attribute FAIL is equal to True. If so, then simply reset scene. (The level value will stay the same).
If the FAIL attribute is equal to false (meaning all actors in our grid are the correct colour), then I simply change Level to +1, and the reset scene.
Thats it.
I have taken a few short cuts to see if I can get it to work. Which seems to be working. The way it is set up means you can as many Colour Layers as you want.
Next, I want to add some transitions between levels, a camera shake for incorrect attempts and maybe some better level designs.
Thanks for reading,
Two.E
Comments
Ha! I was gonna say...
That's pretty cool - I like seeing the video and then seeing your thought process - there's always something to learn from everyone, so this is very insightful! Thanks for sharing!
Hey @Two.E -- I am very interested in how you solve the challenge. Thanks for sharing this!